Capturing the mesmerizing underwater world while scuba diving requires more than just a waterproof camera – it demands thoughtful consideration of how to mount your GoPro securely and effectively. From mask mounts that deliver immersive first-person perspectives to versatile tray systems that improve stability, each mounting option presents distinct advantages and challenges for underwater videography. The choice of attachment method not only affects video quality but likewise impacts your diving experience and safety underwater. Understanding these mounting solutions and their applications will transform your underwater footage from shaky amateur clips to professional-quality underwater documentation.
Key Takeaways
- Choose a chest mount for maximum stability and natural perspective while keeping hands free for diving equipment.
- Secure your GoPro to mask straps for eye-level footage, ensuring minimal drag and clear point-of-view shots.
- Use dual-handle tray systems with additional mounting points for lights when diving in deeper or darker waters.
- Always attach safety tethers or lanyards to prevent equipment loss, regardless of chosen mounting method.
- Double-check all mounting hardware is properly tightened and verify connections regularly throughout your dive.
Choosing the Right GoPro Mount
When selecting a GoPro mount for scuba exploration, several key factors must be considered to guarantee peak filming performance underwater. The mount’s stability, durability, and ease of adjustment are paramount considerations that directly impact your filming success beneath the waves.
For hands-free exploration experiences, the chest mount offers exceptional stability and captures footage from a natural perspective, while the mask mount provides a true point-of-view angle that perfectly captures marine life encounters. The wrist mount, featuring a rotating arm, allows quick adjustments during dynamic underwater scenarios and proves particularly useful when investigating reef crevices or swimming through kelp forests.
The tray and grip mount system represents the most versatile option, providing superior stability through its dual-handle design and offering mounting points for additional lighting equipment. For technical explorers, the helmet mount securely attaches to most diving helmets, ensuring steady footage while leaving hands free for equipment manipulation. Each mounting option should include a secure locking mechanism and redundant tethering points to prevent equipment loss, with stainless steel components that resist saltwater corrosion.
Head and Mask Mounting Options
Head and mask mounting options provide unique perspectives for underwater filming that standard handheld setups cannot match. When properly secured, these mounts allow for hands-free recording while maintaining stability during your plunge, enabling you to focus on navigation and equipment management. The key advantage lies in capturing a natural point-of-view perspective that closely mirrors your actual diving experience.
For peak head and mask mounting, consider these proven options:
- Head strap mount – Fits securely over your diving hood or bare head, offering a slightly raised viewing angle that captures both the underwater environment and your hands when needed
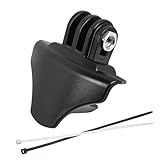
- Mask strap mount – Attaches directly to your mask strap, providing a true eye-level perspective while maintaining a streamlined profile that minimizes drag
- Side mask mount – Connects to the side of your mask frame, delivering a unique lateral perspective while keeping the camera close to your line of sight
- Third-person mount – Extends from your mask using an adjustable arm, capturing both you and your surroundings simultaneously, ideal for self-documentation during dives
Wrist and Hand Attachments
Wrist and hand attachments represent two of the most versatile mounting solutions for underwater GoPro photography. The wrist mount, which securely straps to your forearm like a watch, allows for quick adjustments and instant access to controls while maintaining your hands free for crucial diving equipment. This mounting option proves particularly valuable when maneuvering through tight spaces or managing rapid changes in shooting angles.
Hand grips offer another effective solution, coming in various designs from simple pistol-style handles to more sophisticated three-way adjustable mounts. These accessories typically feature a sturdy grip with a mounting point for your GoPro, while some models incorporate extension arms for greater reach and filming flexibility. Premium hand grips often include floating materials to prevent camera loss if accidentally released underwater.
When selecting between wrist and hand attachments, consider your diving style and recording needs. Wrist mounts excel in situations requiring frequent hand usage, while hand grips provide superior stability for dedicated filming sessions. Both options should include redundant security measures, such as safety tethers or backup straps, to protect your investment in challenging underwater conditions.
Camera Tray and Handle Systems
For advanced underwater videography, camera tray and handle systems provide exceptional stability and control while diving. These professional-grade mounting solutions transform your GoPro into a more sophisticated underwater filming platform, permitting smoother footage and improved maneuverability in challenging conditions.
A well-designed tray and handle system offers multiple advantages when diving:
- Dual-hand control permits precise camera positioning while maintaining neutral buoyancy, crucial for capturing marine life without disturbing the environment.
- Additional mounting points accommodate lighting accessories, guaranteeing proper illumination at greater depths where natural light diminishes.
- The weighted base helps counteract underwater currents and reduces camera shake, resulting in more professional-looking footage.
- Quick-release mechanisms allow for rapid adjustments and battery changes without dismantling the entire setup.
When selecting a tray system, consider aluminum construction for durability and corrosion resistance in saltwater environments. The mounting plate should feature multiple threaded holes for versatile accessory placement, while ergonomic handles with textured grips provide secure control even with thick diving gloves. Most systems likewise incorporate lanyard attachment points for additional security during your underwater adventures.
Safety Tips for Underwater Mounting
When attaching GoPro mounts underwater, safety should always be the primary consideration to protect both your equipment and yourself. Verify all mounting hardware is properly tightened before entering the water, and regularly check connections during your plunge to prevent equipment loss.
Double-check that mounting points don’t interfere with critical diving gear, keeping the camera system clear of your regulator hoses, BCD inflator, and emergency equipment. Use safety tethers or lanyards rated for underwater use to secure your GoPro, connecting them to your BCD or wrist strap as a backup measure against loss.
Maintain proper diving form while managing your camera setup, and never compromise your buoyancy control or situational awareness for the sake of getting footage. When mounting the GoPro on extending poles or arms, keep them close to your body during entry and exit, and be mindful of their position to avoid entanglement with marine life or other divers. For night dives, attach reflective tape to your mounting system to improve visibility, and always verify your camera setup doesn’t block your dive light or interfere with hand signals.


